Set up the payment terminal
Before you can connect your Crane Payment Innovations (CPI) terminal to your charge points, you need to reach out to Self Service Technology LTD, who can configure the terminal, so the payments can pass through Monta.
- Reach out to Self Service Technology LTD. at https://www.self-servicetechnology.com/contact
- Share the following information with Self Service Technology LTD to be route the charge payments to your Monta account.
| Distributor/Supplier | Monta |
| Terminal mode | Cloud Terminal |
| Reference name | Pick a name fitting |
| Terminal domain | Customer name, eg. “My operator” |
| MCC | 5552 |
| Bank | Elavon |
Here is a list of the current supported currencies. For now, CranePI supports only GBP and EUR.
| Currency | Merchant ID (MID) | Trading company name |
| GBP | 2101989224 | MONTA APS |
| EUR | 2101990960 | MONTA APS |
Add the CPI Terminal to your Team
When you confirm that the CPI terminal is configured, you can add it to a Team's charge points.
Currently, this action is only available in Monta Portal (old version).
- Open a and click on Team Wallet
- Click on Wallet actions and select Add Payment terminal
- Select CPI payment terminal
- Enter the serial number
- Click on Connect
If you are not able to verify the serial number, please check with Self Services Technologies LTD.
3. Configure and test the terminal
Now that the terminal has been created, you need to configure it to make sure that it works. Perform a test transaction, so the Monta system can verify the Terminal details.
Currently, this action is only available in Monta Portal (old version).
- Click on the Test tab on top of the screen.
- Click on Start Scan and tap a credit card on the device.
- Monta will make authorize 1 EUR/GBP and cancel it to verify that currency is setup correct.
- Click on the Settings tab.
- Set a maximum reservation amount. You can set a maximum amount of money to reserve when a charge is started.
- Click Save.
Now your terminal is ready to be applied to your charge points!
4. Apply to charge points
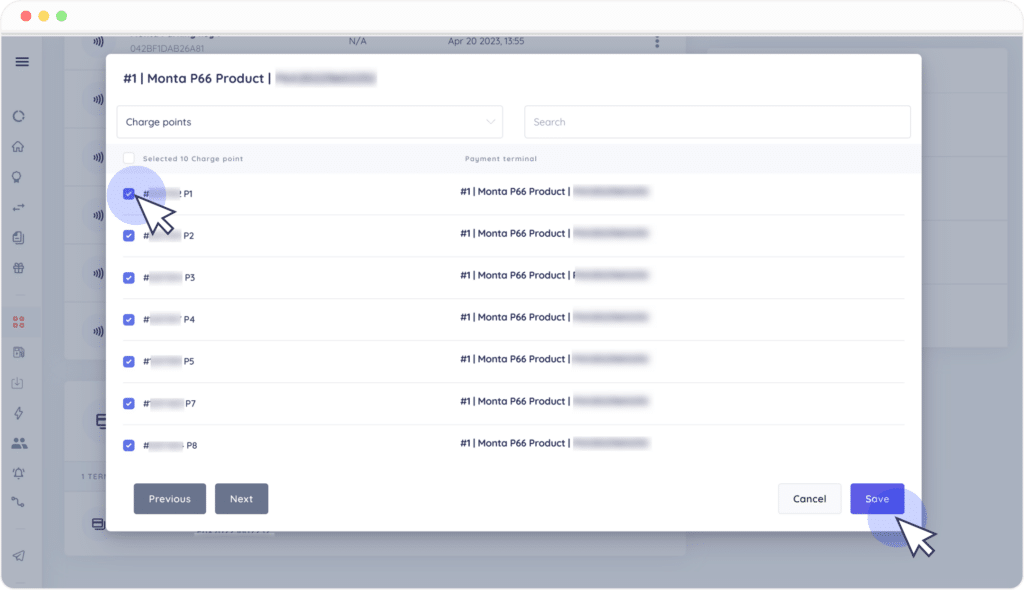
Now, you can select which charge points will be connected to this payment terminal.
Currently, this action is only available in Monta Portal (old version).
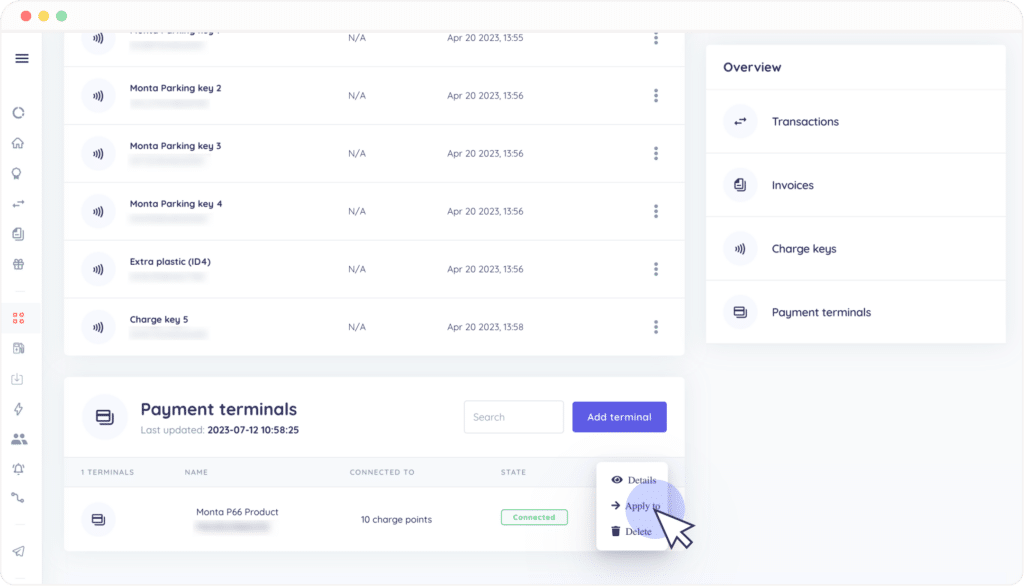
- Click on the three dot action button and select Apply to.

2. Select the charge points and click Save.

